记录一下使用 Hexo, Github pages 和 Travis 搭建个人博客的过程。
目前实现的效果是,本地使用 Markdown 编写博客文章,travis 自动基于仓库源码,构建静态资源,完成网站部署。
以上均为免费服务,无需花钱租用虚拟主机。
1. Github Pages
Github Pages 是 Github 提供的静态页面服务,依据其官网,使用的方式比较简单。
大体的 Gist 就是
- 创建名称为 username.github.io 的代码仓库
- 将 Web 静态资源通过 Git push 到 username.github.io
其中 username 为具体用户登录 Github 网站的账号名称,当浏览器访问 https://username.github.io 时,仓库 master 目录下的静态资源就会被加载。
| Branch | Description |
|---|---|
| develop | 开发分支,管理 Markdown 源码与项目配置文件 |
| master | 存储基于 develop 分支源码生成的静态资源文件 |
2. 流程
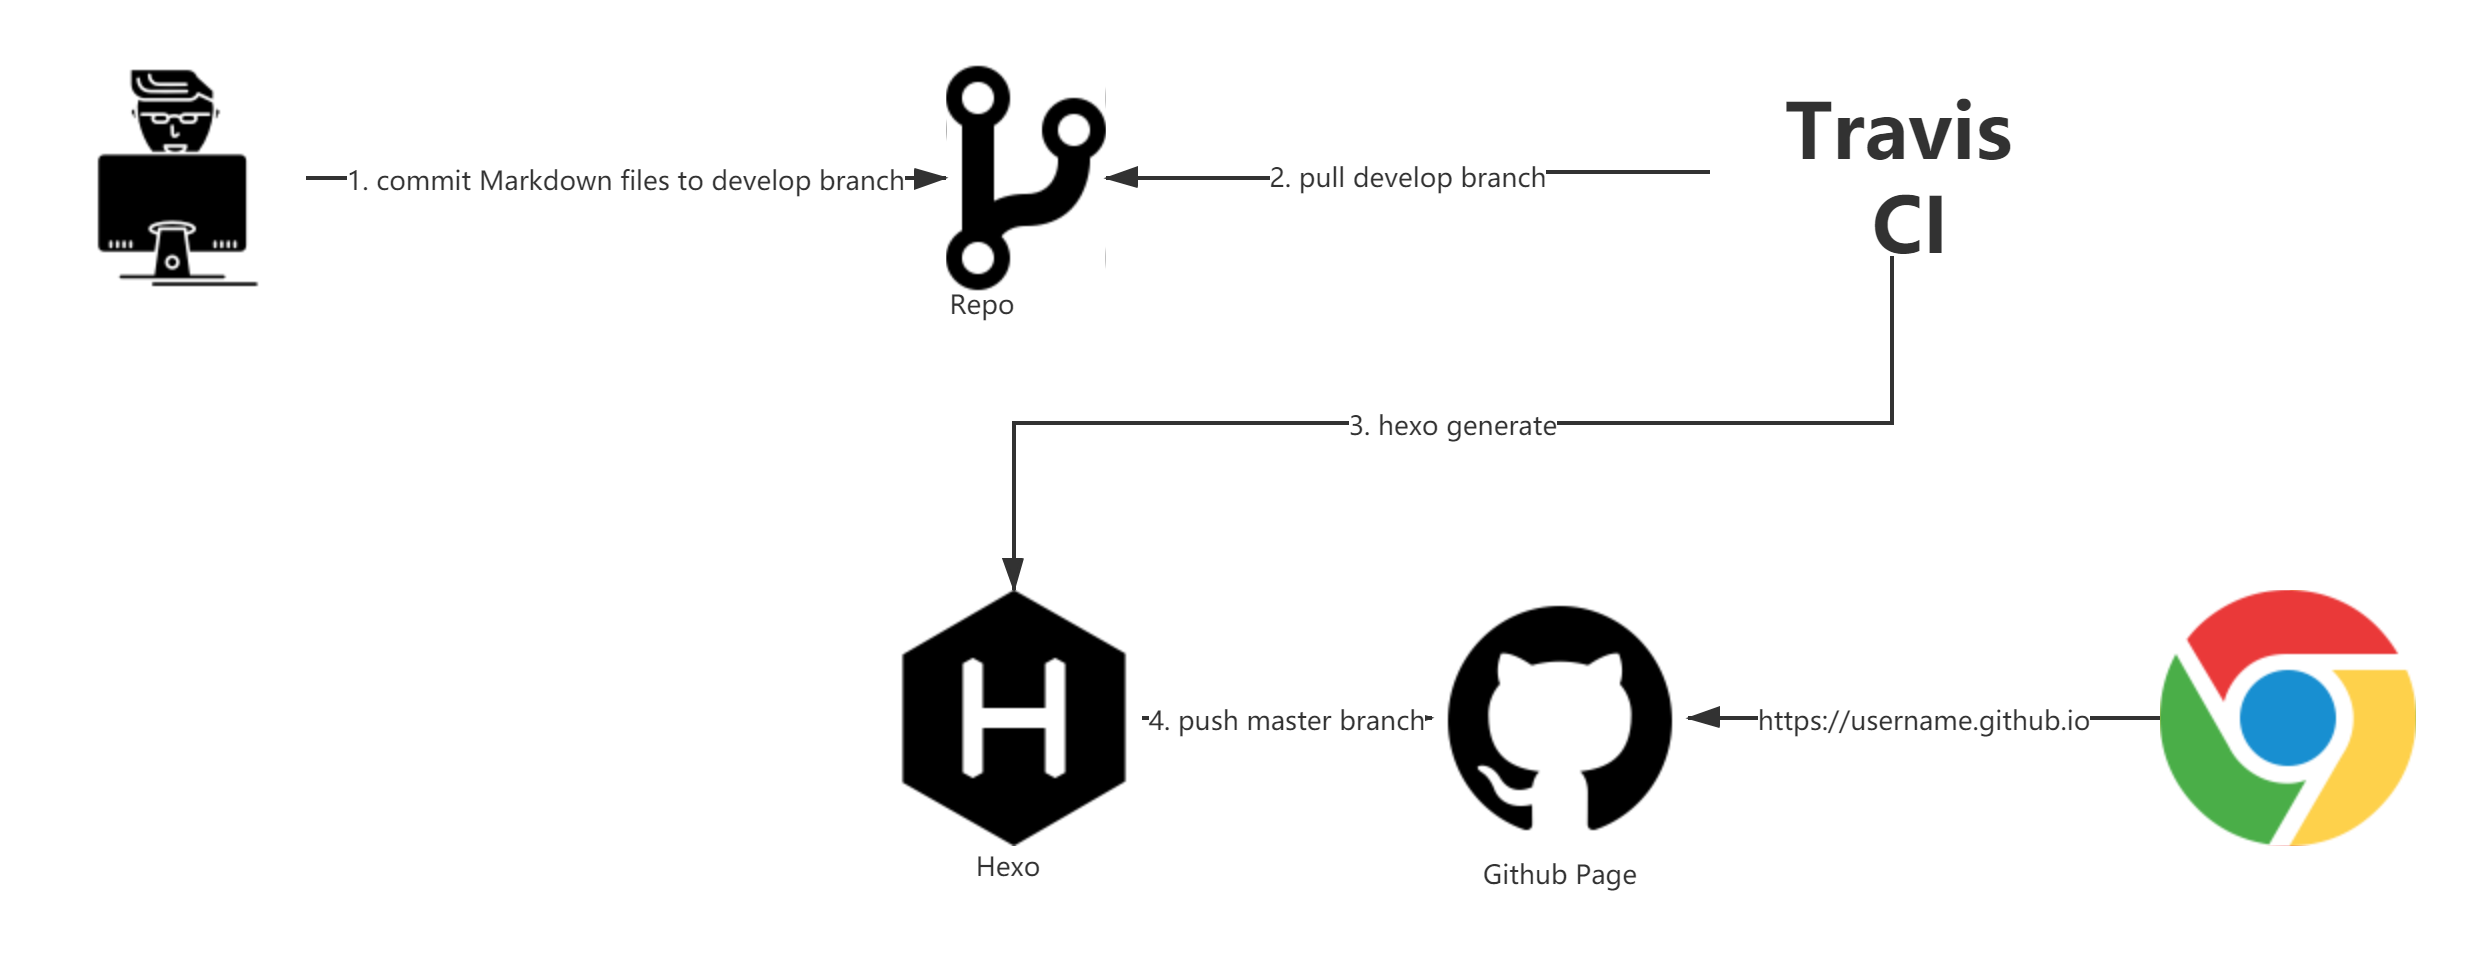
- Hexo 用于将 Markdown 编写的博客文章源文件生成为静态页面
- Github pages serve 生成的静态文件,在公网上提供访问接口
- travis 由 develop 分支的新 commit 触发,执行 hexo generate 命令生成静态文件,并将生成的内容 push 到 master 分支
3. Hexo
A fast, simple & powerful blog framework.
安装命令行工具
1 | npm install hexo-cli -g |
Hexo 的常用命令
创建新文章
1 | hexo new "My New Post" |
本地服务器
1 | hexo server |
生成静态页面
1 | hexo generate |
部署
1 | hexo deploy |
4. Travis
A hosted continuous integration service used to build and test software projects hosted at GitHub
Travis 为 Github 的公开仓库提供免费的构建服务。
整合 Github
- https://github.com/marketplace/travis-ci 添加 Travis App.
- https://github.com/settings/installations 为 Travis 添加访问 Github 公开仓库的权限
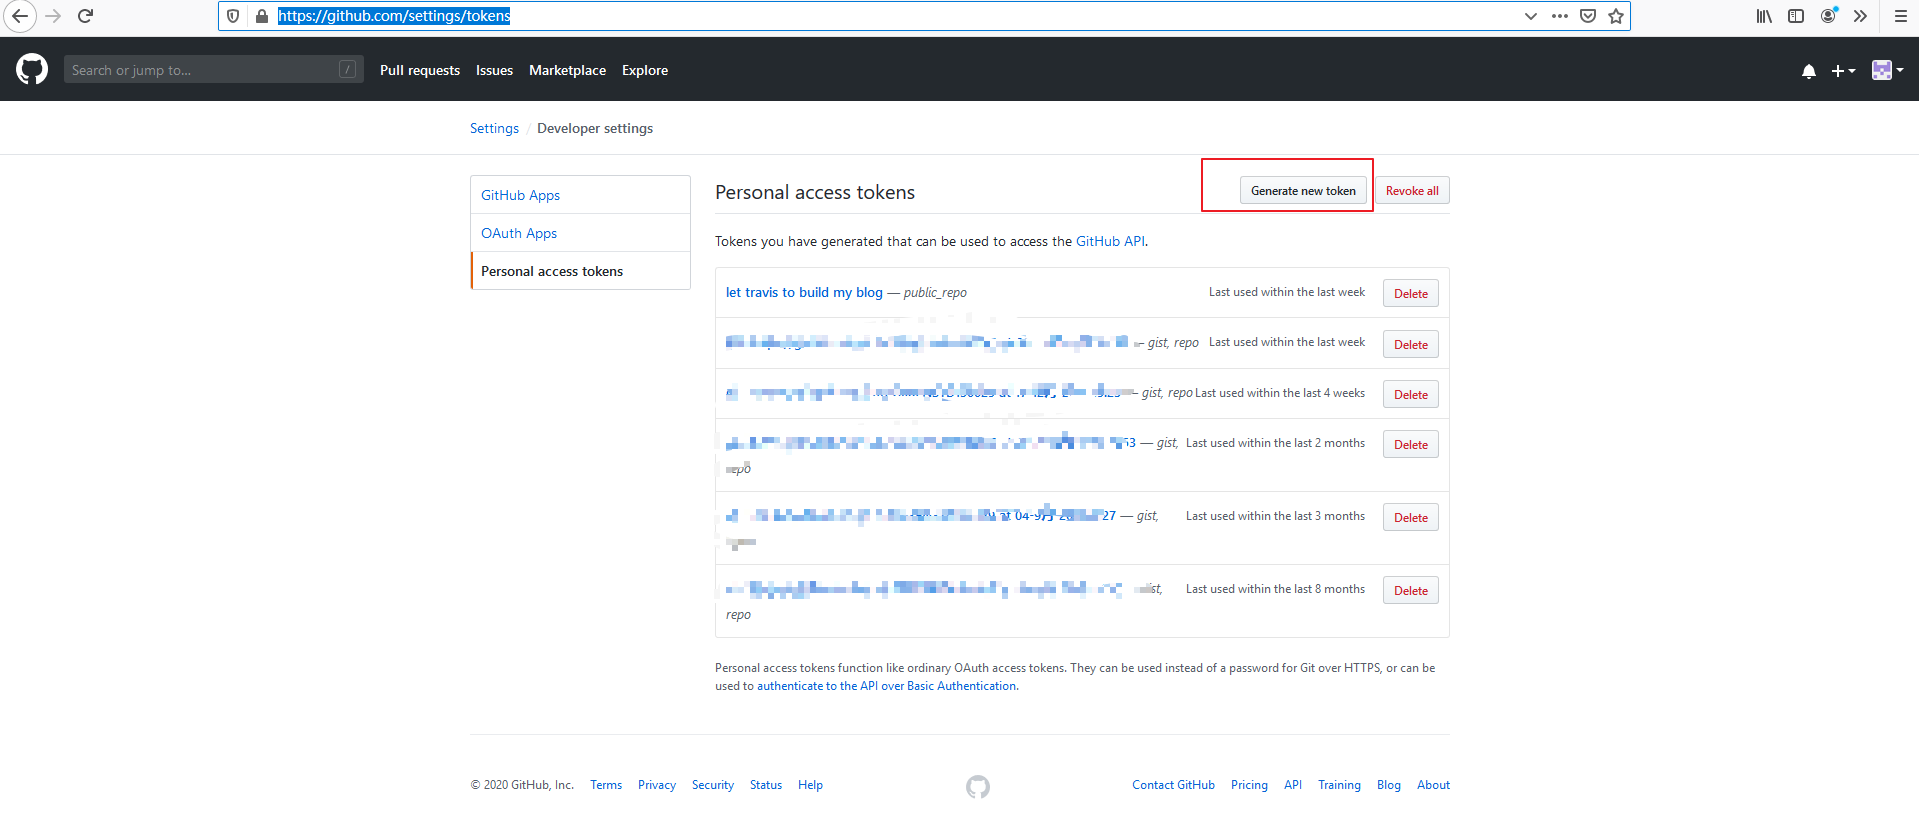
- 打开 https://github.com/settings/tokens 生成 Token 供 Travis 使用
.travis.yml
完成整合后,在项目根目录下添加 .travis.yml 配置文件。
1 | sudo: false |
- github-token: 需要在 travis 中添加 GH_TOKEN 环境变量,环境变量的值为之前生成的 token
- develop 分支用于管理博客 markdown 内容,hexo 配置文件
target_branch: master指定 travis 将hexo generate生成的静态资源文件 push 到 master 分支
5. Summary
详细配置请参考 repo,博客访问地址为 rockingjavabean.github.io。
以上
RockingJavaBean